Turn your own signature into a logo and watermark
In this tutorial, I am going to show you how to create a logo and watermark using your own signature. Create your own stamp by watermarking your photography with your own signature will add a really unique style to your company logo and also protects your images from copyright. It’s simple to do and will also copyright any image you put on the internet.
I’m going to be doing my example in Adobe Photoshop but the same instructions will apply in any digital imaging program.
We’ve also created a similar tutorial where you do the same thing using signature fonts. If you’re looking to watermark your images with fonts and not your signature, click here.
How to turn your Signature into a Logo
Task 1 - Draw your Signature

Use a thick black pen to draw your signature.
This is the easy part - Grab a thick black felt pen, a white sheet of paper and draw your signature on it nice and big. Scan your signature into a computer using any scanner. Set the scanner to scan at around 300 dpi and scan as an image, not text. At this point, it doesn’t matter if you scan in colour or black and white.
Get access to ALL our online courses – 1000’s of videos, worksheets, critiques of student’s work, personalised support and much more with our monthly membership.
Task 2 - Convert your signature into a PNG image
A PNG is an image format that is saved with transparent backgrounds. You now have to create a transparent background then save it as a PNG. Then you can drag and drop your signature logo onto any picture really easily. You can also use it as a logo by putting it onto a coloured background or by simply keeping it as a PNG.

Your signature with the background deleted, ready to save as a PNG.
Screen Capture the signature with the checkered background add test – You’re signature with the background deleted, ready to save as a PNG.
1. Open the scan of your signature in Photoshop.
2. In the layer’s palette there's a lock symbol next to the Background layer. Click on that lock symbol and drag it into the bin. This will turn the background into a layer.

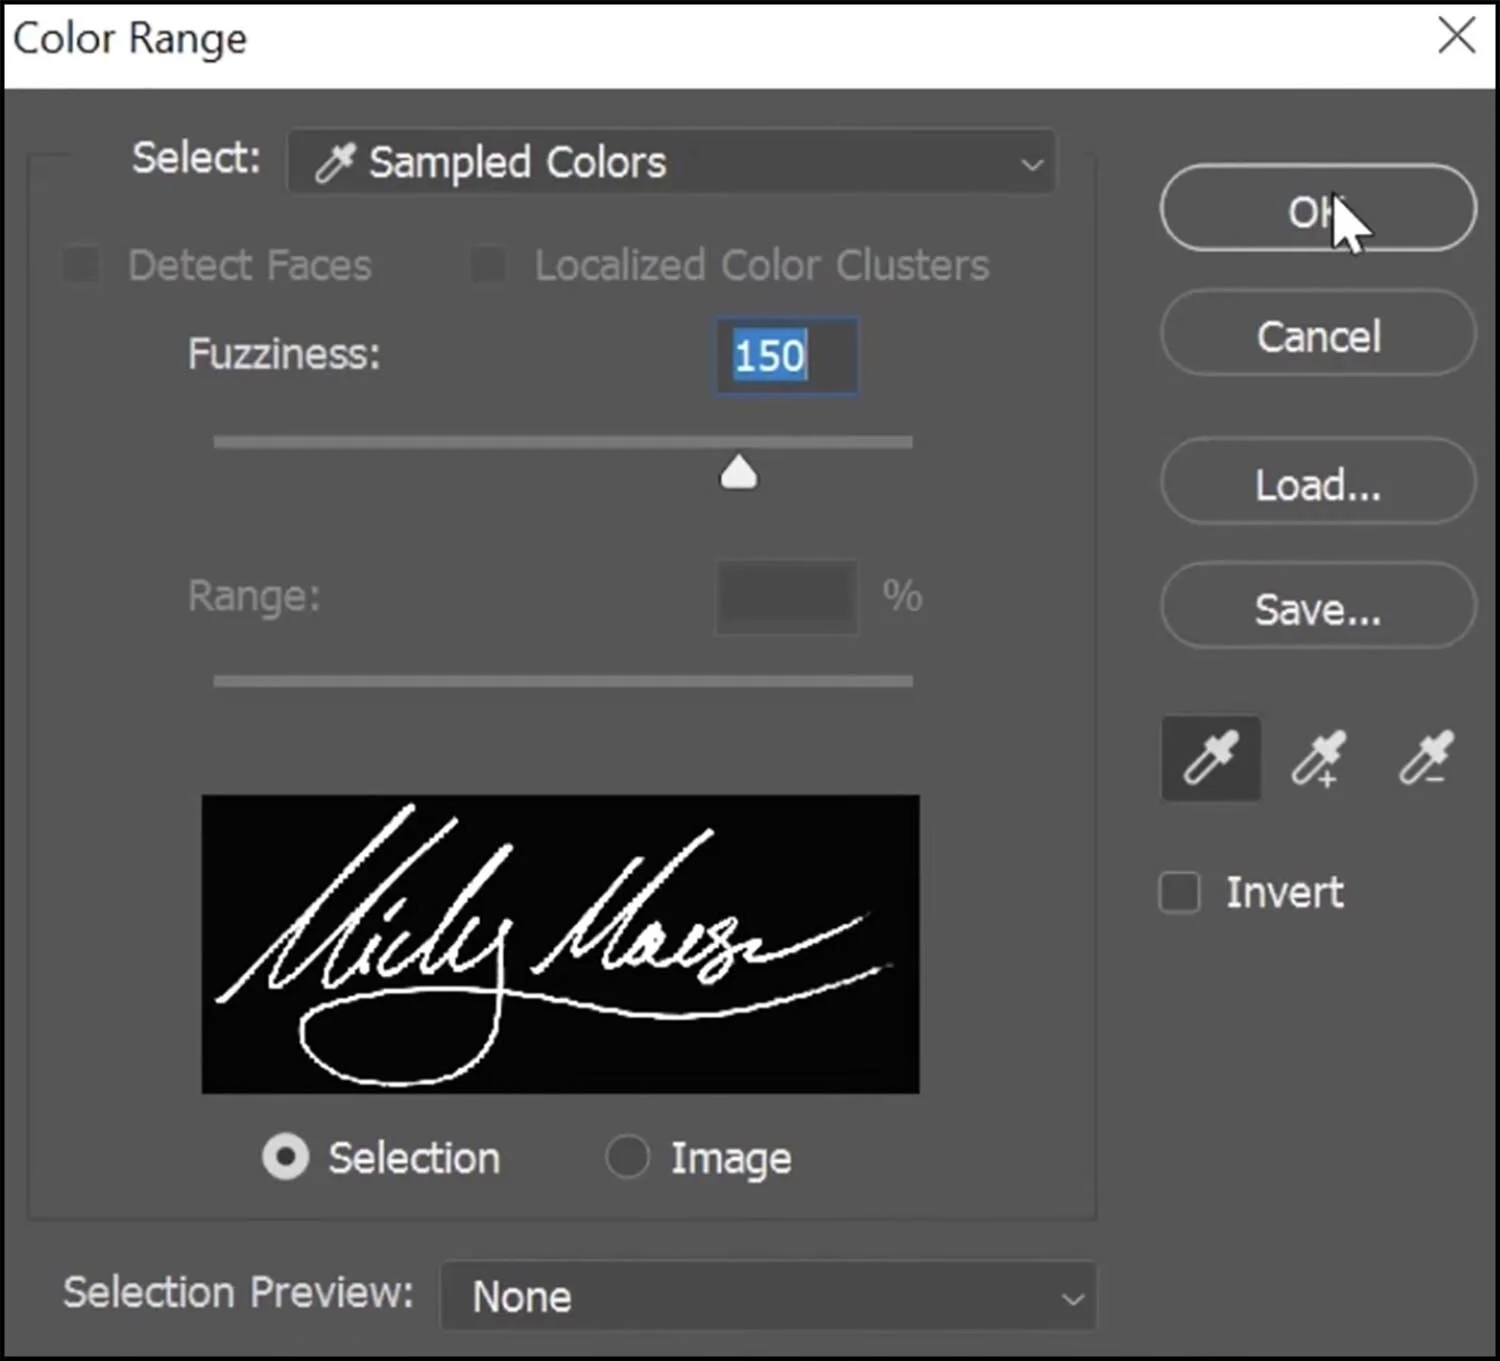
3. Go to Select > Colour Range > Set the Fuzziness to 150 > Select the white background > Click OK. This will select the white background.
4. Press the backspace key on your keyboard to delete the background.
Create a selection using the colour white.
5. Optional – To get a smoother finish to your signature or control the thickness of it, use Photoshop’s Select and Mask options. Please watch the video for detailed instructions.
6. Go to File > Save As > from the drop-down menu select PNG > save it in a location for easy access later > a box will appear, select save as largest file size > click OK
You've just created a PNG which is effectively an image with a transparent background.
Task 3 – Add your signature as a watermark or logo
Now all that’s left to do is to use your newly created signature PNG. To do that, simply drag the PNG onto any picture, resize and move it to suit
Voila! - You’ve just created a watermark using your own signature. To use it as a logo, simply add it where you want as you would a normal image- Easy!
To learn Photoshop properly, click here.

Example of using your own signature as a watermark on photography.
Apply the signature to a bulk load of images using Lightroom
The other way to add your signature as watermark is to use Adobe Lightroom. In Lightroom, you can add a watermark to a batch of pictures and export them all at once using presets. It’s a brilliant program to use for this as it speeds up your workflow and makes your photography look much more professional.
If you would like to learn how to use lightroom we do have an in-depth Lightroom course which will tell you how to do this and many other things to improve your photography.
To learn lightroom and add bulk signature watermarks, click here.

Add a signature watermark to many images at once using Lightroom.
Like this? - Check out similar tutorials below


I hope you liked this video, please leave us a comment and support us by sharing it with your friends and subscribe to our newsletter at the bottom of this page for more.
We also have an excellent learning community on social media so please join us there as well.
Thanks for watching and remember – Learn more at The School of Photography.
